Where to start tiling so you don't end up with a strip of offcuts
· 5 min read
The starting point decides how the last row looks. How to set it, when to shift the grid and which wall to watch most closely.
The most common tiling mistake isn't a crooked cut or badly chosen grout. It's that the first tile lands in a corner, because that's simply where it's convenient to start — and three days later a strip of two-centimetre offcuts runs along the most visible wall in the room.
That strip isn't down to a lack of precision. It comes out of arithmetic that could have been done before the first cut.
Why the corner is a bad starting point
Starting in the corner fixes the whole grid in advance. The rest of the room gets whatever is left over — literally the remainder of the room width divided by the tile width plus the joint.
Take a room 340 cm wide and a 60 cm tile with a 3 mm joint. The module works out at 60.3 cm. That gives 5 full tiles (301.5 cm) and 38.5 cm left over. This one happens to be a good case — the cut piece is wider than half a tile and will look natural.
310 cm turns out worse: 5 tiles take up 301.5 cm and 8.5 cm is left. A narrow strip along the wall, and the more regular the rest of the layout, the more it catches the eye.
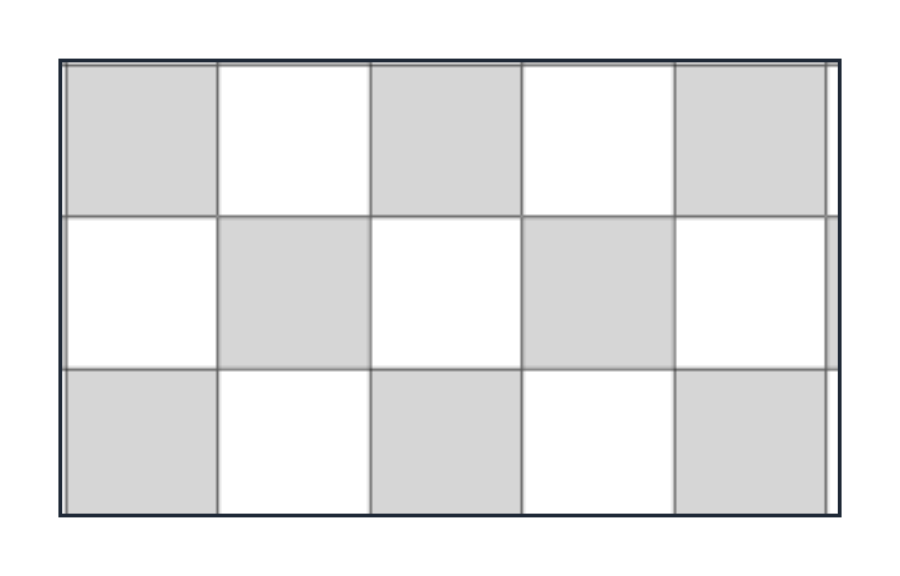
The half-tile rule
A rule worth remembering: the cut piece at the wall should never be narrower than half a tile.
It isn't a building code, just an observation about how the eye works. A cut piece wider than half reads as part of the layout. Narrower — as a mistake. With a 60 cm tile that line falls somewhere around 30 cm.
When the numbers come out lower than that, there are two ways out.
Shifting the grid
Instead of starting from the wall, the whole layout gets shifted so the remainder is split between the two sides. In the 310 cm example, a single 8.5 cm strip becomes two strips of 34.25 cm. Both are wider than half a tile, and the layout looks planned, because it is symmetrical.
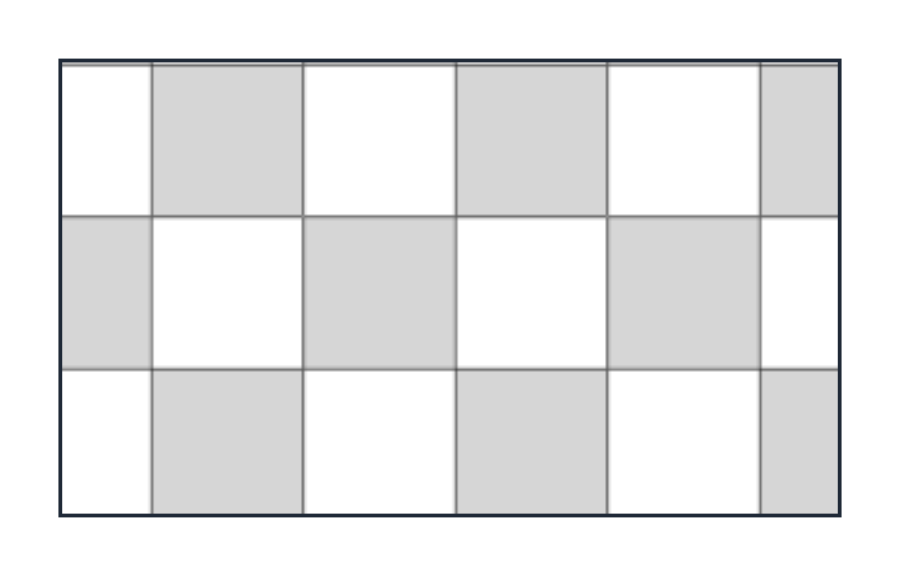
In practice this is the most common solution, and the main reason it is worth drawing the layout before any work begins.
Changing the format
Sometimes a small change of tile size solves the problem better than shifting does. The same 310 cm room with a 50 cm tile and a 3 mm joint: module 50.3 cm, six tiles make 301.8 cm, 8.2 cm left over — still bad. A 45 cm tile gives a module of 45.3 cm, six pieces make 271.8 cm, 38.2 cm left, so 19.1 cm per side. Not enough. At 40 cm: module 40.3, seven pieces 282.1, remainder 27.9 — 14 cm per side. Worse still.
The conclusion is less obvious than it seems: a smaller tile does not automatically mean a better fit. Every case has to be worked out on its own, because intuition fails here.
Which wall to watch
Not every edge is equally visible. In a typical room the order of importance looks like this:
- The wall opposite the door — that's where the eye lands on the way in. Cut pieces show up most here.
- The doorway to the next room — with a continuous layout the grid has to line up on both sides of the threshold.
- The window side — light running along the floor picks out every irregularity in a row.
- The wall behind the furniture — the least important. This is where narrow cut pieces get pushed when there is no way to avoid them.
If one narrow strip is still left after the grid has been shifted, that is exactly where it belongs.
Wall tiles follow the same rules
On a wall there is one more dimension in play. The half rule applies horizontally in just the same way, but vertically what matters more is where the top row ends.
A narrow strip under the ceiling looks bad, but a narrow strip just above a bathtub or a worktop looks worse — it sits right at eye level. That's why a wall layout is usually planned from the most important horizontal line in the room rather than from the floor.
Before any cutting starts
A short list of things to check:
- The room measured in three places on each axis. Walls are rarely parallel, and a difference of two centimetres changes the result.
- The joint added to the tile size — the module is tile plus joint, not the tile on its own.
- The cut piece checked at both ends of each axis, not just at one.
- The most visible edge identified and calculated first.
- The material bought last — because only by then is the real quantity known.
Easier to calculate than to draw
All this arithmetic is simple, it just has to be repeated with every change of starting point. On paper that means redrawing the grid every single time.
That's what the HandyLay planner was built for: draw the room, set the tile format and the joint width, then move the starting point and watch what happens at the edges. Cut pieces and surface area recalculate while dragging.
A quarter of an hour at the screen saves a day with the chisel.